Projects of the Water Cycle: Engaging Activities for All Ages

The water cycle, also known as the hydrological cycle, is a fundamental concept in earth science that describes the continuous movement of water on, above, and below the surface of the Earth. Understanding the water cycle is crucial for grasping how water supports life, shapes the climate, and sustains ecosystems. Engaging in hands-on projects about the water cycle can enhance learning and make the subject more enjoyable. This blog post will explore a variety of water cycle projects suitable for different age groups, along with detailed instructions and the educational benefits of each activity.
The Water Cycle: A Brief Overview
The water cycle consists of several key processes:
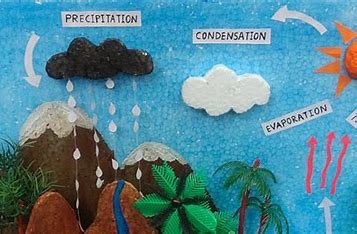
- Evaporation: The transformation of water from liquid to gas as it rises from bodies of water into the atmosphere.
- Condensation: The process where water vapor cools and changes back into liquid droplets, forming clouds.
- Precipitation: When these droplets combine and fall back to Earth as rain, snow, sleet, or hail.
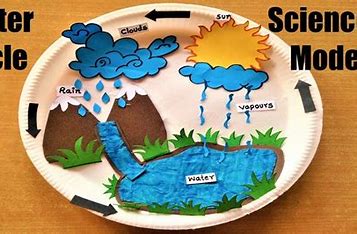
- Collection: The accumulation of water in oceans, rivers, lakes, and groundwater, which will eventually evaporate again, continuing the cycle.
Hands-On Water Cycle Projects
1. Water Cycle in a Bag
Age Group: Elementary School
Materials:
- Ziplock bag
- Permanent marker
- Water
- Blue food coloring
- Clear tape
Instructions:
- Draw the Cycle: Using the permanent marker, draw a simple water cycle diagram on the Ziplock bag, including the sun, water, clouds, and rain.
- Prepare the Water: Fill the bag with a small amount of water and add a few drops of blue food coloring to make it more visible.
- Seal and Tape: Seal the bag tightly and tape it to a sunny window.
- Observe: Over time, observe the processes of evaporation (water will form droplets on the sides of the bag), condensation (droplets will gather at the top), and precipitation (droplets will fall back down).
Educational Benefits:
- Visual representation of the water cycle stages.
- Understanding the role of the sun in evaporation.
- Observing the cycle in real-time.
2. Miniature Terrarium
Age Group: Middle School
Materials:
- Clear plastic container with a lid
- Small plants
- Soil
- Gravel
- Water
- Small spray bottle
Instructions:
- Layer the Gravel: Add a layer of gravel at the bottom of the container for drainage.
- Add Soil: Place soil on top of the gravel.
- Plant: Plant small plants in the soil.
- Water: Lightly water the plants using a spray bottle.
- Seal and Place: Close the lid and place the container in indirect sunlight.
- Observe: Over days, observe the water cycle within the terrarium – water will evaporate, condense on the container walls, and precipitate back into the soil.
Educational Benefits:
- Demonstrates a closed system of the water cycle.
- Highlights the role of plants in transpiration.
- Encourages understanding of ecosystems and sustainability.
3. Create a Water Cycle Model
Age Group: High School
Materials:
- Large plastic or glass container
- Heat lamp or strong light source
- Ice cubes
- Small mirror or glass sheet
- Water
Instructions:
- Setup: Fill the container with a small amount of water.
- Heat Source: Position the heat lamp above the container to simulate the sun’s heat.
- Condensation: Place the mirror or glass sheet at an angle above the container and put ice cubes on top of it.
- Observe: Turn on the heat lamp. Over time, observe the water evaporating, condensing on the cool surface of the mirror/glass, and eventually dripping back into the container, simulating precipitation.
Educational Benefits:
- In-depth understanding of the water cycle.
- Demonstrates the effects of temperature on water state changes.
- Encourages exploration of scientific principles like heat transfer and phase changes.
4. Water Cycle Wheel
Age Group: Elementary and Middle School
Materials:
- Printable water cycle wheel template
- Scissors
- Brass fastener
- Crayons or markers
Instructions:
- Color and Cut: Color the water cycle template and cut out the sections.
- Assemble: Attach the sections together using a brass fastener to create a spinning wheel.
- Label: Label each part of the cycle: evaporation, condensation, precipitation, and collection.
- Spin and Learn: Use the wheel to learn and review the stages of the water cycle.
Educational Benefits:
- Interactive learning tool.
- Reinforces the stages and terminology of the water cycle.
- Suitable for group activities and discussions.
Conclusion
Engaging in hands-on projects about the water cycle not only makes learning fun but also deepens understanding of this vital natural process. From simple experiments like the water cycle in a bag to more complex models and terrariums, these activities cater to various age groups and educational levels. By exploring these projects, students can visualize and grasp the continuous movement of water on Earth, fostering a greater appreciation for the natural world and the importance of water conservation.

